UV Mapping
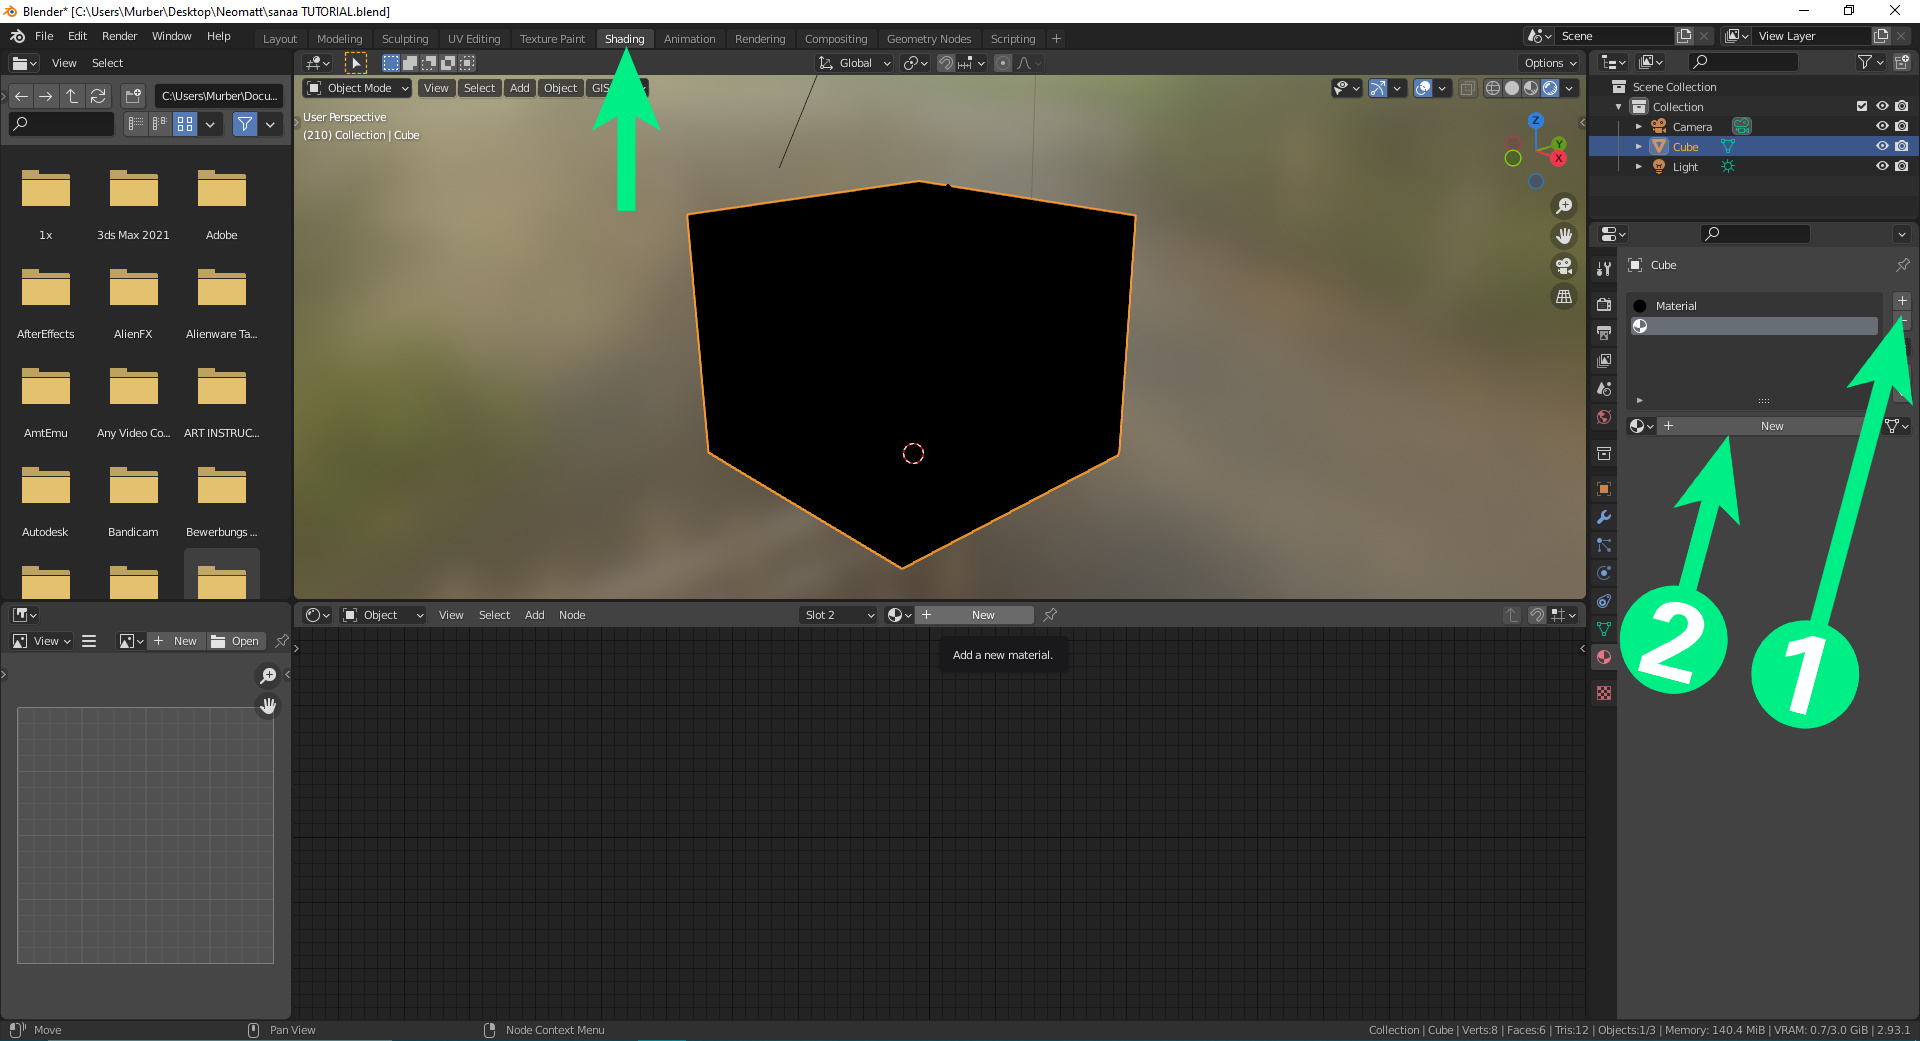
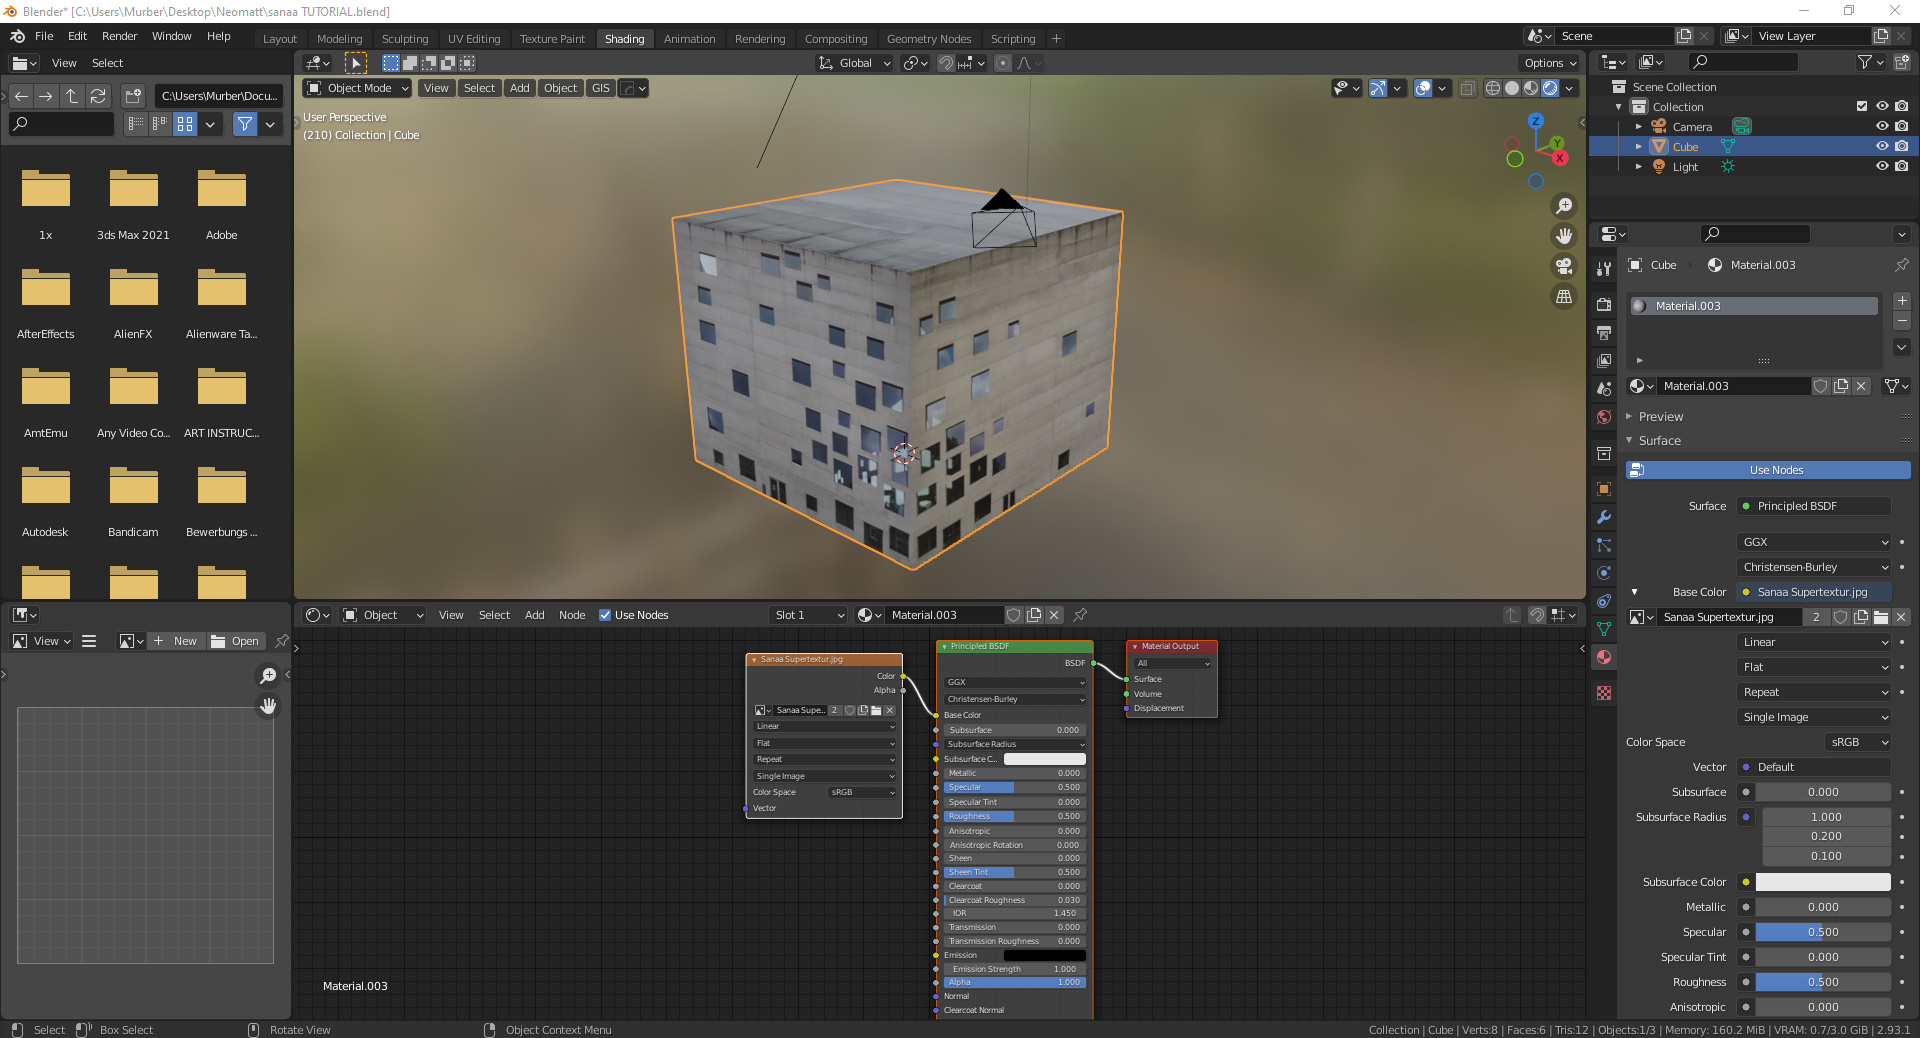
To import the texture onto a Blender model, we need to switch to the shading tab on the top toolbar. To add a new material, click on the “+” sign on the right under the material properties tab (1), then click the “New Material” button (2). This will generate new nodes below (see next image).

A principled BSDF and material output node should have appeared in the material field. We need to add a texture node to import the new texture. Go to Add- texture- image texture, and import the new texture. Add the join the “Colour” on the image texture to the “Base Colour” on the Principled BSDF. You can also select the existing texture and add the node and texture there.
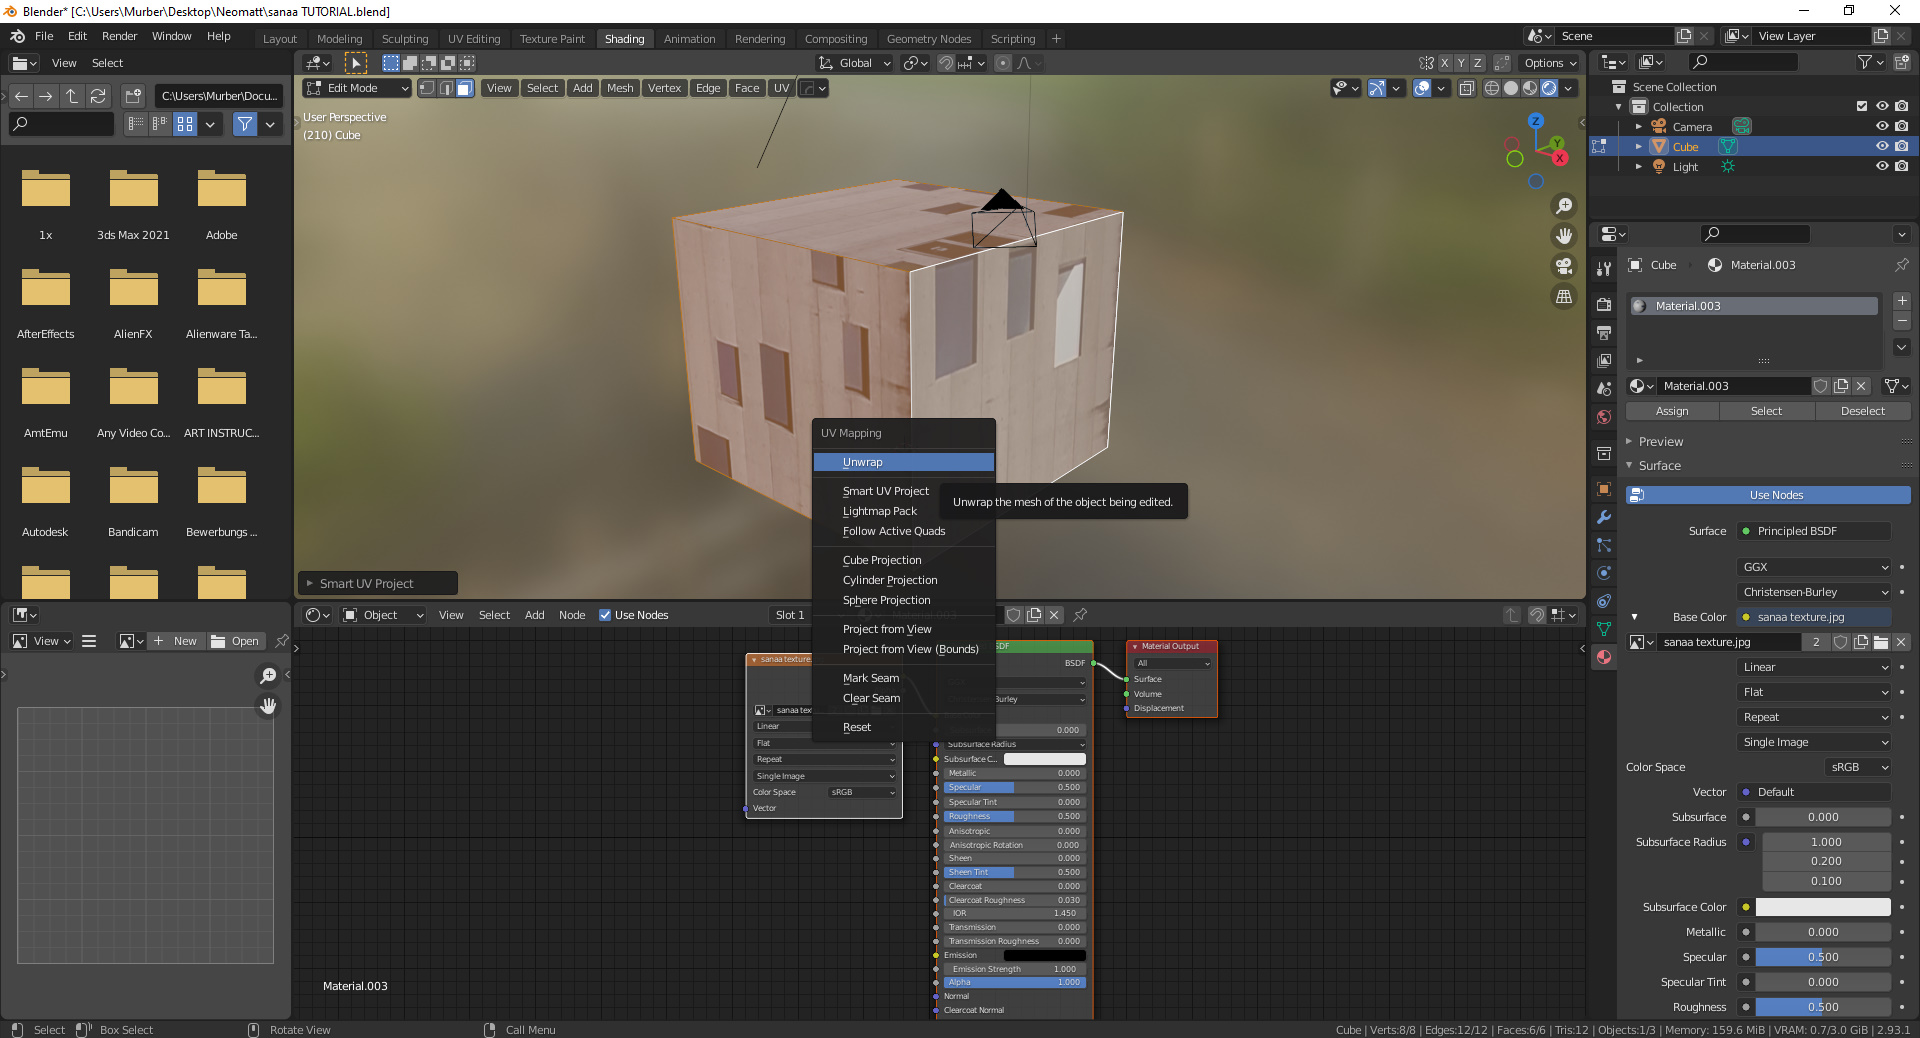
The texture will import completely out of scale and often rotated 90 degrees. To correct this, we need to use the UV Mapping tab. To have Blender project the new texture in 2D in the UV Mapping tab, we need to first select the entire object (A) in edit mode, press “U” and then choose “Unwrap”. This takes the model and lays it out flat, like the way a cardboard box looks when layed flat. This makes it easier to position the textures accurately.

On the left you can see the model unwrapped. This is the reason the textures are so distorted on the model- the UVs are not yet correctly positioned on the left.
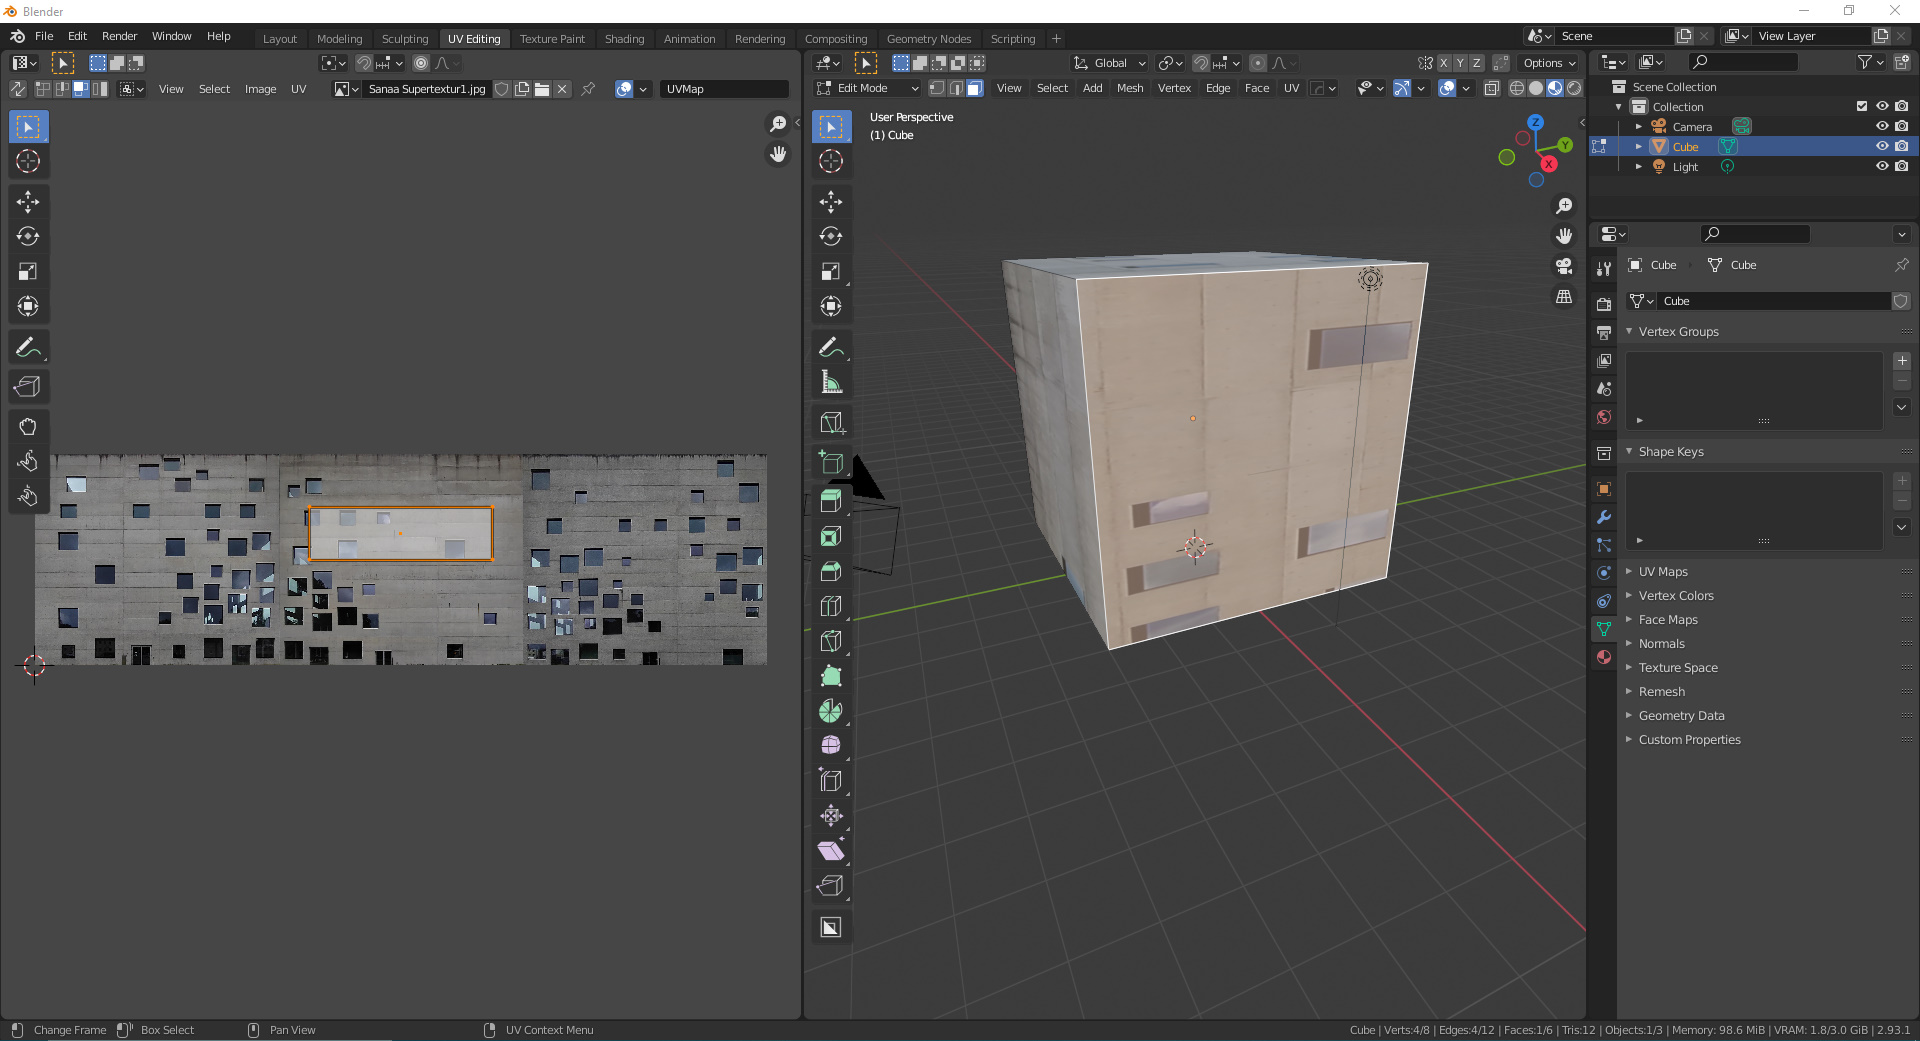
Choosing a single face on the model will display that UV on the left- the UV can be understood as a window- whatever is seen through the window will be shown on the model. It is now a simple matter of selecting the vertices, vertexes or faces on the left, and moving it to fit. It can also be scaled to fit, or two corners can be selected and moved into place as desired. Tip– after pressing “G” to move the vertices, lock them to the x,y, and z axis by pushing x,y,or z. This will keep the UV square.
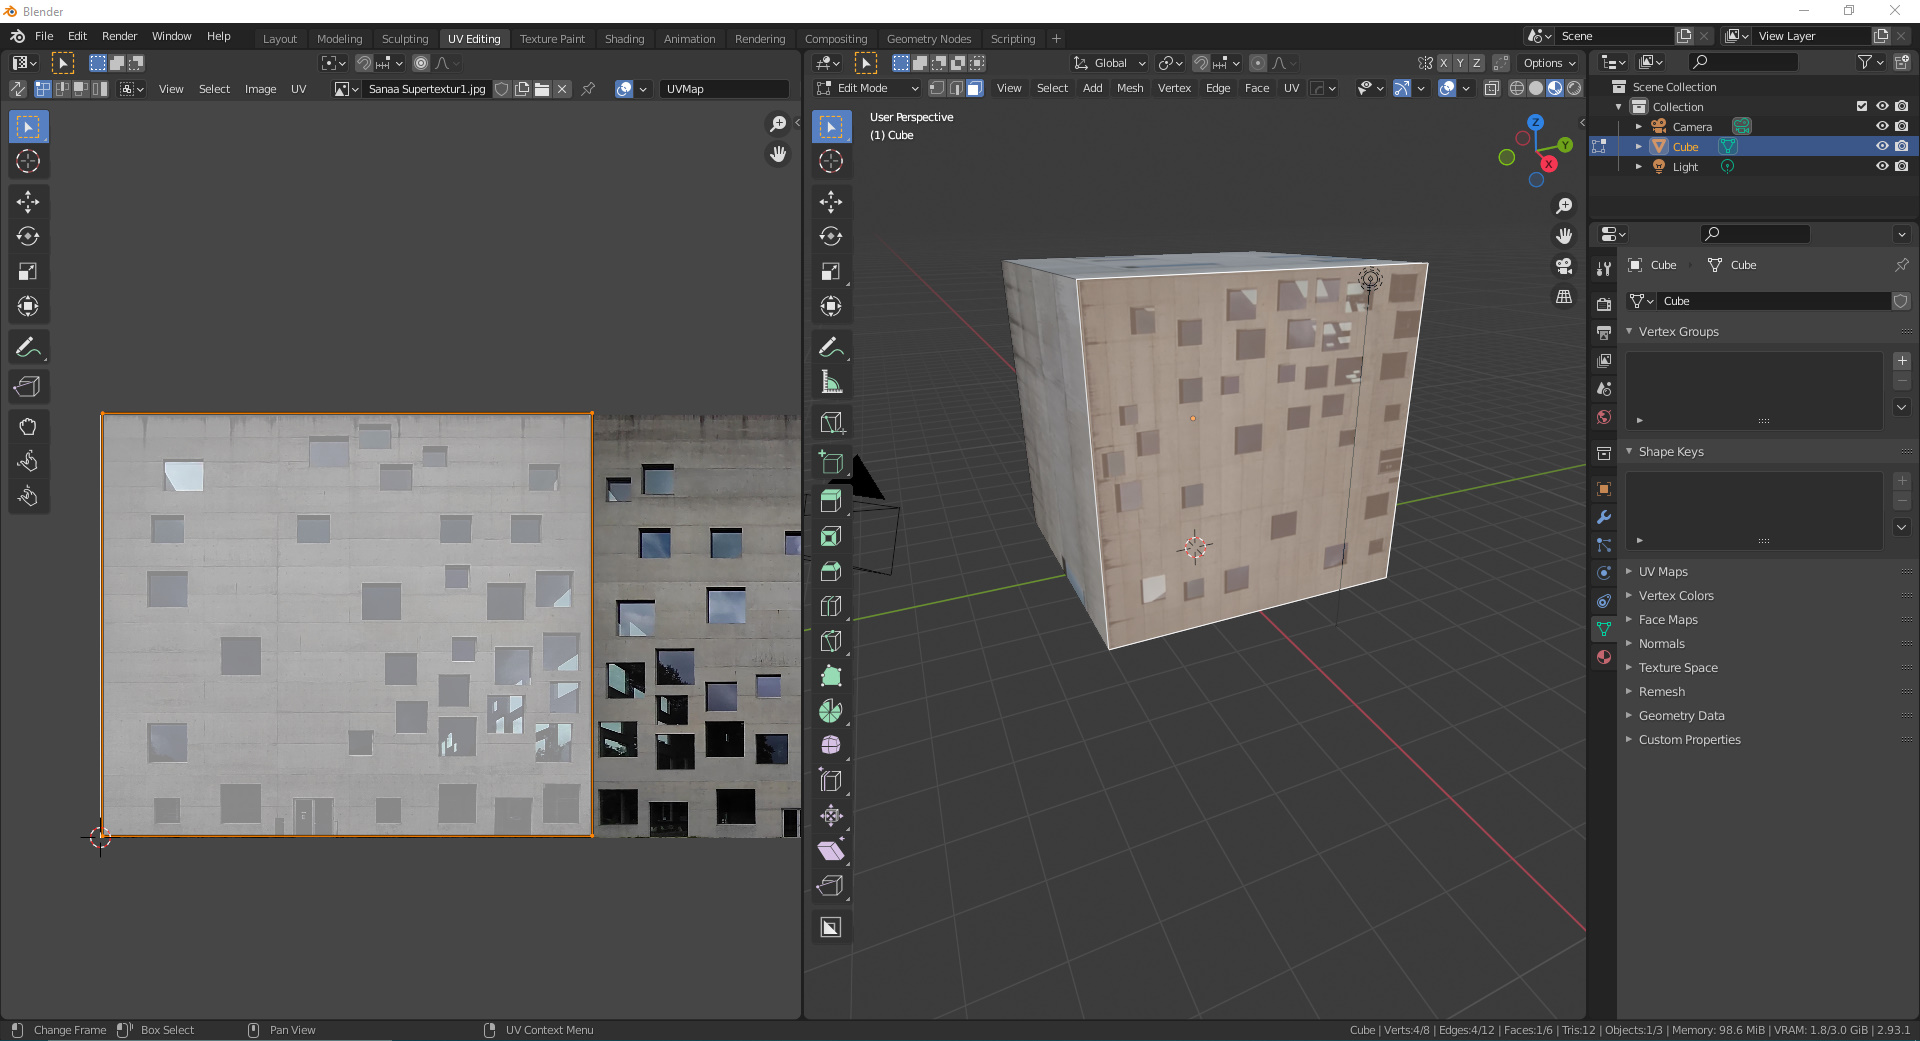
The texture was also imported rotated in relation to the model. Select all the vertices and rotate (R) 90 degrees (after pressing R, press 90, or -90 and then enter). Then reposition the vertices again to fit. The fourth side can use any of the existing textures.
The model is ready for any additional effects. The roof can be sampled by a section of the walls that don’t have windows, since the roof is will not be a point of focus. Alternatively, another material can be applied and another texture loaded.